User Guide
About This Document
This is a user guide for the Pop Up Mkt application. This guide will give instructions for use and some troubleshooting tips. The screenshots displayed in this document reflect the Apple iOS Phone app and the while the functionality is the same the Andriod and the online Website, screens may appear a little different.
Any questions or issues can be reported to support@popupmkt.com
Purpose of Application
The Pop Up Mkt app connects local buyers with local vendors to make in person shopping easy and convenient. The application provides buyers a way to find the best locally sourced produce, food, and crafts by discovering and following your local farmer's market vendors, artisans, and food trucks.
Vendors on Pop Up Mkt get a quick and simple way to advertise their goods, location, and hours to connect with their customers in real time.
Buyers using Pop Up Mkt get an easy way to find, follow and get the unique real time notifications about their favorite vendors and goods in their area.
Download The App
The Pop Up Mkt app is available on iOS through the Apple Store, Android through the Playstore, or on the web at www.popupmkt.com
Download the app on your mobile device for the most up to date features.
Application Icon
The Pop Up Mkt icon appears with the trademarked logo on your mobile device:

Try It
The Pop Up Mkt app has a "Try It" feature that allows users to explore features without registration. It option appears on the Login screen as a button. Simply click the button to enter Pop Up Mkt in Try It mode. No registration is required, and limited features will be available.

Pop Up Mkt opens to the map when in Try It or a Buyer account, but the map is available on all account types. The app uses the mobile devices GPS location to display the location of the user, and identify and display any open markets using the Pop Up Mkt flag within the area of the user.
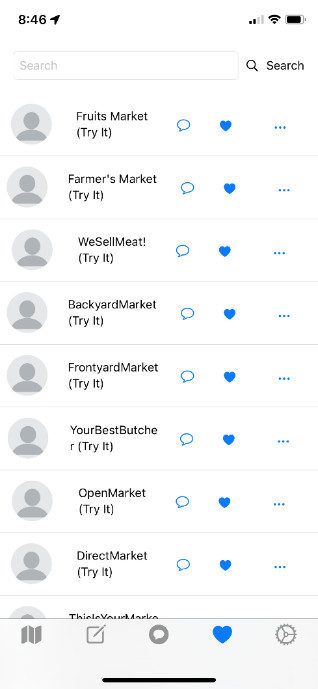
Menu in Try It
The bottom of the application displays the app menu options.

Map

The Pop Up Mkt yellow flag in the map indicates an open market. The Map is available in Try It, as a Buyer, or as a Vendor and will be live for all 3 account types.

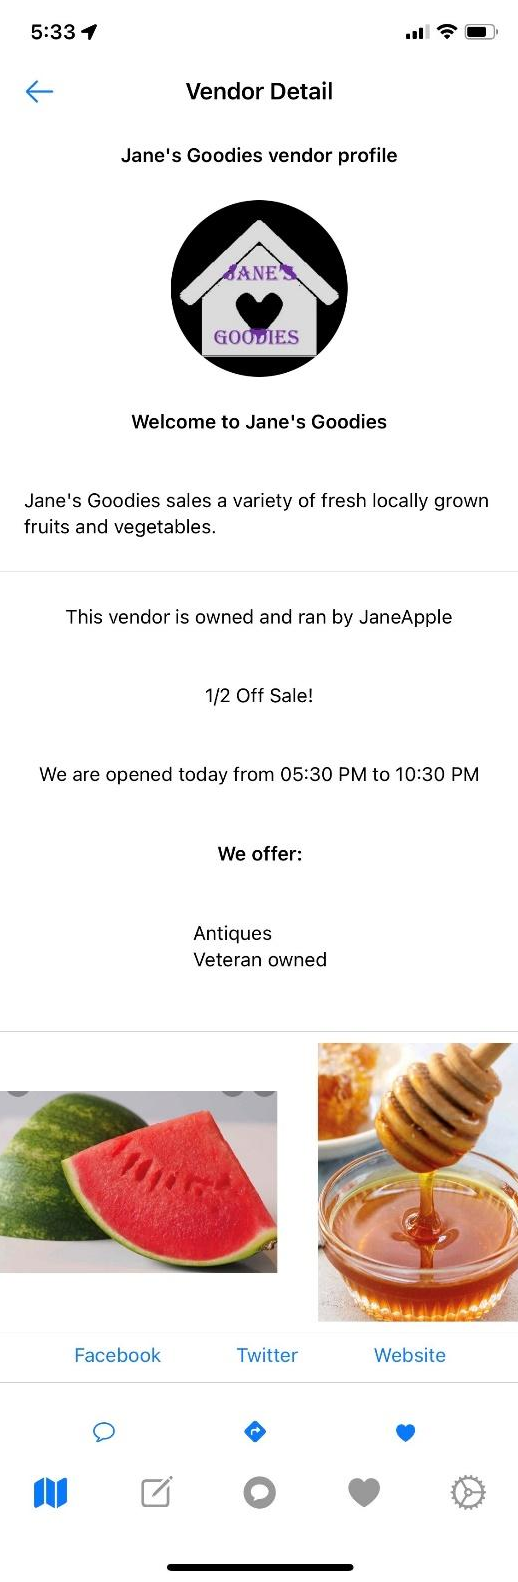
Vendor Detail

The vendor detail screen will display the vendor's information from the map but will also display from Favorites.
Map Filter

The Map Filter will allow the map to be filtered to display vendors in a specific criterion. This menu only appears when the map is selected on the menu.
Future Feature coming soon: Jump To filter to allow user to jump to a new location on the map

Messages

In Try It mode the Messages screen will display example texts of messages and reply's between a buyer and a vendor to indicate how the feature works. Messages can be used as a Vendor or Buyer and offers an easy way for communications.


Favorites

In Try It mode the Favorites screen will display examples of vendors a buyer has selected as a "Favorite" and the ability to see vendor details and example messages. Favorites is only seen in the Buyers experience.

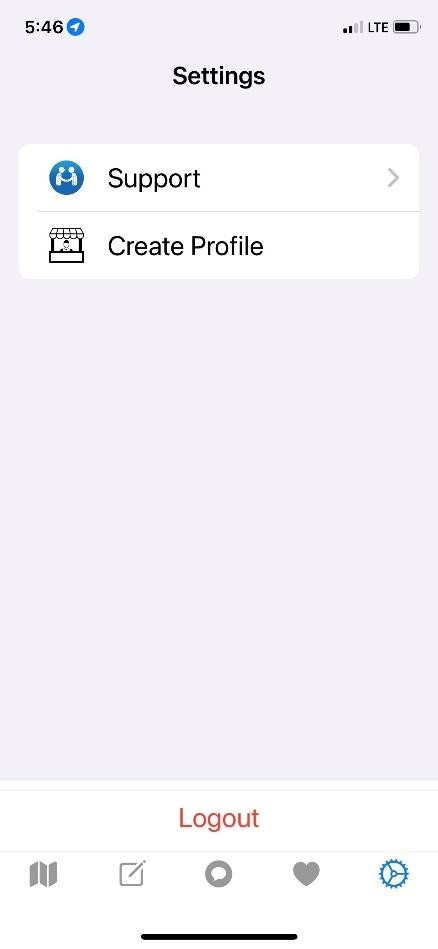
Settings

In Try It mode the Settings screen displays a "Create Profile" option for easy registration and allow logout.
Pop Up Mkt Registration
A user can register from multiple locations for Pop Up Mkt.
- Mobile Device on the application Login screen > Sign Up (Recommended)
- Mobile Device on the application Login screen > Try It > Settings > Create Profile
- The web site at www.popupmkt.com Login tab > Sign Up
The User Experience
To register, the user will need to determine if they will set up a buyers account or a vendors account. Note that a buyers account can be set up initially and a vendors account can be added later if needed.
The Pop Up Mkt app offers two different user profiles. A buyer and a vendor.
Buyer Experience
- The unique experience of getting real time notifications on your phone for your favorite vendors and/or type of goods you are looking for in a pre-defined area and time you set!
- Easily view a list of local Farmers, Artisans, Food trucks, and Farmers Markets in your area on a convenient interactive map.
- Get directions to a vendor's location.
- Quickly access vendor information, type of goods, and links back to their websites and social media pages.
- Easily instant message directly with a vendor for questions or other communication.
Vendor Experience
- Farmers, Artisans, and Food Truck Operators can bring in new local buyers by showcasing your information with the types of goods and services you are selling in your profile.
- Have your buyers "favorite" you so they can follow you and get a real time notification when you are near them and keep count of how many followers you have!
- Provide customers fast links back to your website and social media pages.
- Easily update your location and hours of operation on the convenient interactive map daily.
- New buyers in your area can discover you by seeing you on the map or getting notified of a vendor with a good or service they are looking for.
- Easily Instant message with your customers at your convenience.
- Vendors will have buyers accounts as well and switch between the two in one easy click of a button.
Application Registration
If registration is occurring from either the "Sign Up" option or from the Try It >Settings> Create Account option, it will follow the same instructions.

Registration Information

If the Email or User Name is not unique an error message will displayed like this:

User Profile Setup
The user will set up the User profile in the next step. This step can be skipped by selecting "Submit" and done within the application later if preferred.
Select Image
The Select Image button allow the user to select an image from the devices photo gallery to be displayed as the user profile. This image can be changed at anytime from the application.
User must allow access to the photos on the device.
The photo must be a jpeg, jpg, png, and a maximum of 10 megabytes in size.

Setup Goods
The Setup Goods button allows the user to select the goods they are interested in as a buyer. These can be changed at any time from the application.

Email Verification
The email verification registration step takes place after the user profile setup screen. The email entered in the initial registration setup will receive an email with a 6-digit code to be used during this step. The email also contains a link that can be used instead of the 6-digit validation incase the user cannot complete registration at this time.


Buyer or Vendor Selection
Once verified the next step in the registration process is to "Continue as a Buyer" or "Create A Vendor Account".

Creating a Vendor Account
Once selecting the "Create Vendor Account" the user is redirected to the Pop Up Mkt web page.
The user may be asked to allow the application to use the devices' current location and accept the cookies.
- All policies can be found on our site at www.popupmkt.com.
- Allow Current Location

The user will then select which subscription they would like as a Vendor by chosen the proper radio button and selecting the Subscribe button.

Stripe Process
Once the subscription has been chosen, the user is redirected the secure Stripe side for payment.
Apple Pay or Credit Card payment can be set up, but the user will not be charged until after the 60 days free trial.

Once user fills in the credit card information they will select "Start trial" and Stripe will provide information as to when the charge will begin.
Note: The trial can be cancelled at any time prior to the 60 days trial being completed and no charge will taking place.


After selecting "Start trial" the user will be redirected to the Pop Up Mkt web page and will be directed to return to the application or the website home page. For ease of use it is recommended that the user return to the application and proceed with the vendor setup.
If directly completing this registration from the application, return to the phone app and choose "CONTINUE AS VENDOR".

Vendor Profile Set Up
The Vendor Profile tab allows the user to set up all relevant business information. All information and media can be changed at any time by returning to Settings > Profile > Vendor Profile
This is unique to Vendors. Note that the User Profile tab displays the information that was set up during the initial registration and can also be changed. A Vendor will automatically have a Buyers account as well and can switch between accounts at any time to have a Buyers experience as well.


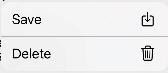
Note: Either Save button saves the entire screen, two are provided to reduce scrolling when there are multiple media added.
Setting Up Vendor Profile Outside Registration Process
If the subscription set up is completed later or the phone app has been closed simply open it again and continue to log in with the credentials set up during the initial registration process and go to
1. Settings > 2. Profile > 3. Vendor Profile and set up Vendor information.
Logging Into The Pop Up Mkt App
To log into the Pop Up Mkt app once it is downloaded on the device, click on the Pop Up Mkt icon. The Pop Up Mkt logo will appear until connected.


Once connected the user will be prompted for Email, Password, a Remember Me option, and a Sign Up & Try It option.

Forgot Password
If a user forgets their password they can click on the "Forgot Password?" option on the bottom of the Pop Up Mkt LOG IN screen and

Once clicking the link the user will receive a message "Password reset successful, please check your email for further instructions"
A second email will be received with a new temporary password and instructions to reset the password after the next login. The user can reset the password in their User Profile.

Once logged in with temporary password, proceed to Settings> User Profile > and update Password
Logging In If Email Is Not Verified
If a user did not complete the verification steps at the time of registration and no longer has the email with the access link a new one can be generated from the Pop Up Mkt login screen.
Proceed to the login screen and enter the email address and password used during the registration process. An error message will be received "Account not validated" and an option to "Resend Email" will be available as in the below screenshot.

Vendor Experience
The first time a Vendor logs in they will need to set up their Vendor Profile which is their business information. This is the public information the Buyers will see about the vendor. See the "Vendor Profile Setup" section to complete the vendor profile if not already completed.
Menu as a Vendor
When logged in as Vendor the menu will be displayed with the following.

When user is on the Map the Map Filter menu appears for use but disappears when on any of the other menus.

Vendor Pop Up

If logging in with a Vendor Profile the app will log directly into the Vendor Pop Up Screen.
The purpose of this screen is to control the Vendors Market. This is how the Vendor communicates for the day to the local buyers. The intent is a fast, easy way to keep it accurate. All data, except for goods, will automatically delete every night so incorrect data is never shared and locations are not stored after closing.

This data automatically generates a yellow Pop Up Mkt flag on the Map for buyers to locate and see Vendor Detail when selected.

If GPS is deselected Vendor will have the option to manually enter an address

Follower Counts
When a Buyer selects a vendor as a Favorites the vendors Followers tracker is updated, and the Vendor is celebrated the next time they log in with a confetti splash.

Goods I'm Selling Today
The Goods I'm Selling Today option opens the list of goods and services for the Vendor to list what they have available for the day. This is the same list that Buyers choose from as the list they are Interested in on their User Profile to get notification on when meeting their criteria. The goods and services are also displayed on the Vendor Details and Vendors can update them at any time.

Settings
Settings as a vendor allows the user to open a Support ticket, update profiles, or switch to Buyer account.

User Profile
The User Profile was set up during the registration process and all information except the email address can be completed or updated at any time. The email address is the account identifier and cannot be changed through the application.
Contact support@popupmkt.com if an email address needs to be updated.

Buyer's Experience
The Buyer will be on the map at login. The first time a Buyer logs in they will need to set up their Notifications and finish the User Profile if it was skipped during Registration .
Menu as a Buyer

Note: Map Filter is only visible when on the Map.
Settings
There will a slight difference in the Settings menu depending on if the Buyer has just a Buyer account or if they have a Vendor account as well. From the Buyer only account they will have the option to "Create Vendor Profile" and from a Buyer with Vendor account they will have the option to Switch between the accounts.
Buyer with Vendor Account View


User Profile
The User Profile for a Vendor or Buyer is set up exactly the same and uses the information from the Registration process. See User Profile under Vendor section for details on page.

Notifications
Under Profile a Buyer has a Notifications tab to set notifications preferences. Notifications have to be allowed on the device.

The user's devices will get a notification when the selected criteria in the Notifications settings are met listing the Vendor that meets the criteria.

Support
Support provides an option for the user to send a request to Pop Up Mkt admins directly from the Settings menu. It will provide the admins with device type and OS version for accurate troubleshooting.

Cancelling or Updating Vendor Subscription
To cancel a subscription, go to Settings > Profile > Vendor Profile > Subscription Setup - this will redirect to the Stripe website to Cancel or Update Subscription Billing information.


Pop Up Mkt Information
The Pop Up Mkt Mission: To ignite opportunity by connecting local vendors and buyers in-person, anywhere, and anytime.
Support: support@popupmkt.com
Questions: admin@popupmkt.com